In this woocommerce tutorial, you will learn two ways how you can add a “Continue Shopping” button on the cart and checkout page. The first way is using the action hooks and the second way is using the template file.
By default, woocommerce gives a “Return to Store” button on the cart page but we can change the string of it on the cart page and also add it to the checkout page.
Adding a “Continue Shopping” button to the WooCommerce Cart and Checkout pages can be a useful feature for customers who want to continue shopping after reviewing the items in their cart. This button can redirect customers back to the shop page and keep them engaged with your online store.
See Also: WooCommerce Action Hooks: Shop / Archive / Category Pages
Let’s see two ways to add a “Continue Shopping” button to the WooCommerce Cart and Checkout pages:
Method 1: Using WooCommerce Action Hooks
In this method, we will use the woocomemrce action hooks to customize the Return to Store button. We will make a function with the string that we want to display (like Continue Shopping) and then hit this function on a specific action.
On Cart Page
THE FOLLOWING METHODS ARE TO ADD A CONTINUE SHOPPING BUTTON ON DIFFERENT POSITION OF CART PAGE USING THE WOOCOMMERCE ACTION HOOKS.
The first thing you have to open the functions.php file in your editor. I would recommend using the child theme’s functions.php file, so you don’t lose your changes while updating your theme.
See Also: How to Create a Child Theme in WordPress?
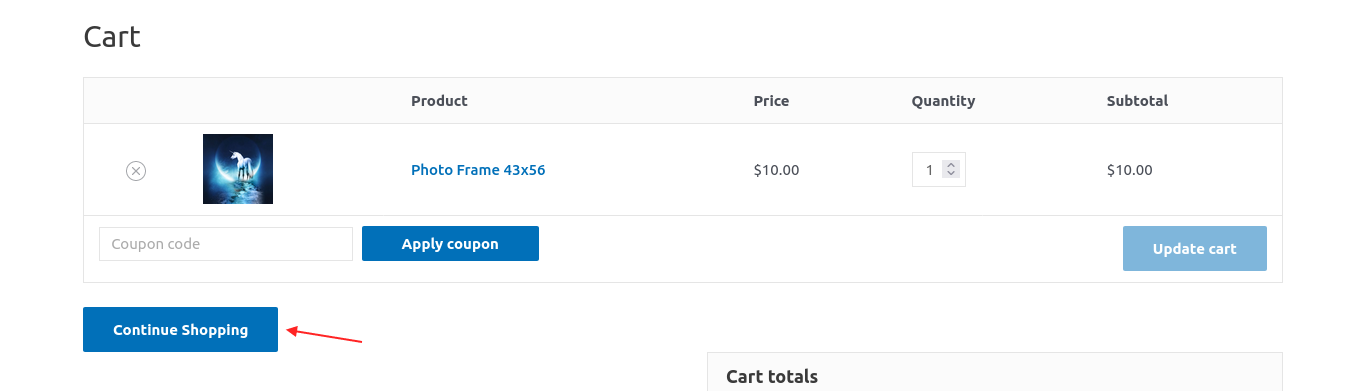
1. Display Continue Shopping Button After Cart Total
Now you have to make a function to add a shopping button on the cart and checkout page and then hit with woocommerce action hook. There are many hooks that you can use, I will show them one by one.
Here’s the code you need to add:
In the above code, we made a function echoing the Continue Shopping button using the filter hook (you can also use the custom button) and used the woocommerce_after_cart_table action hook. Also, get the shop page URL dynamically using the wc_get_page_permalink() function.
This hook will print the Continue Shopping button on the cart page after the cart table. But by using the other hooks you can display it anywhere.
Let’s see other action hooks that you can use to display the Continue Shopping button wherever you want.
See Also: How to Add Text after OR before Cart Button in WooCommerce?
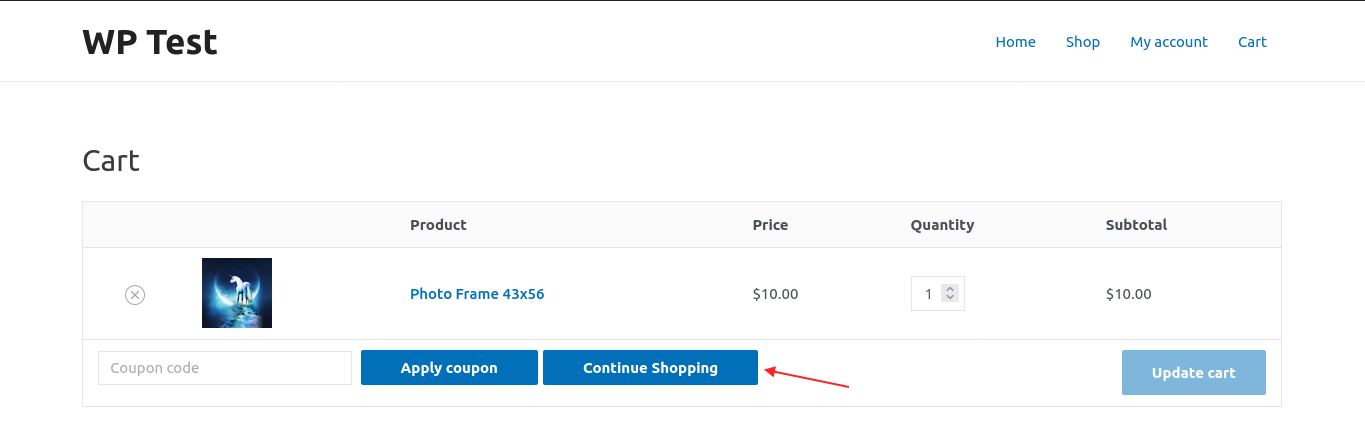
2. Display Continue Shopping Button Near Coupon Button
To display the “Continue Shopping” button near the “Apply Coupon” button you can use the woocommerce_cart_coupon hook.
You just have to change the action hook name in the above code as below. And you can also change the string of a button as required.
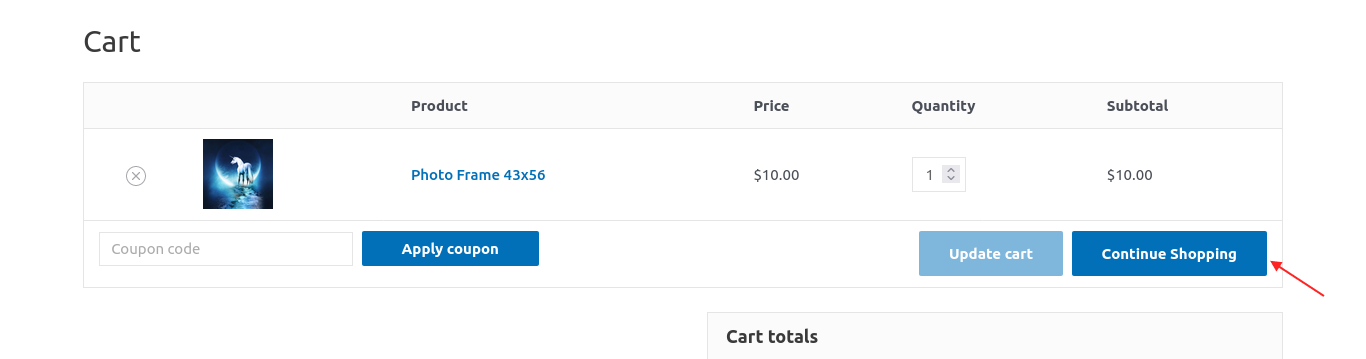
3. Display Continue Shopping Button On Right Side of Cart Actions
To add a “Continue Shopping” button on the right side of the cart page, you can use the woocommerce_cart_actions hook. It will display the button near the Update cart button on the right side.
Just change the woocommerce_cart_actions hook in the above code and save it.
On Checkout Page
THE FOLLOWING METHOD IS USED TO ADD A CONTINUE SHOPPING BUTTON ON THE CHECKOUT PAGE USING THE WOOCOMMERCE ACTION HOOKS.
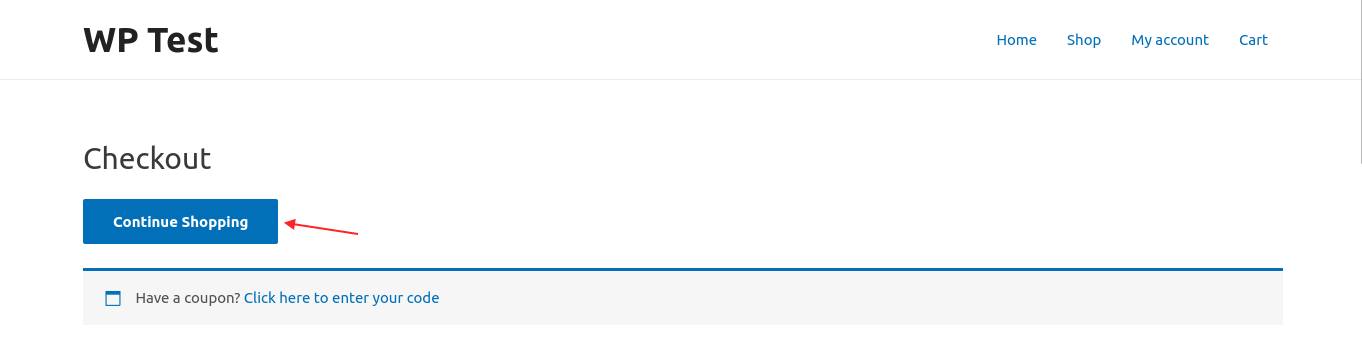
1. Display Continue Shopping Button Before Checkout Form
The above we see to add a button on the cart page, now we will display the Continue Shopping button on the checkout form.
We will use the woocommerce action hook to hit the function to display the button with a custom string that we want.
Add the following code to the functions.php file.
The code is the same as the cart code in the earlier code. We just change the action hook with the checkout form hook woocommerce_before_checkout_form.
You can also display a button as woocommerce message style wrapping the anchor tag <a> in <div> tag with “woocommerce-message” class.
At the checkout page, you can also use other hooks to display the Continue Shopping button in a different position.
Method 2: Using the WooCommerce Template
In this method, we will modify or add a Continue Shopping button on the cart and checkout page with the help of woocommerce template files.
The woocommerce template files that you can use to customize the existing functionality of woocommerce. You can add your feature or upgrade as you require using these files. These files are located in the /template folder.
Here are the steps to customize woocommerce template.
Step 1: Create a new folder in the child theme
The first step you have to create a new “woocommerce” folder inside your child theme. You can also use the parent theme but I would suggest using a child theme so you don’t lose your customization while theme updation.
Step 2: Copy file from plugin folder
Now copy the cart.php file from /wp-content/plugins/woocommerce/templates/cart directory of the plugin folder to customize the cart template.
Add this file into the /cart folder inside of the child theme’s “woocomemrce” folder. By doing this woocommerce tells WordPress to use that file instead of an original plugin file.
Same way to customize the checkout template files by copying the files from /plugins/woocommerce/templates/checkout folder and pasting them into the theme’s /woocommerce/checkout folder.
Step 3: Append code in files
Now we have copied files in the theme’s folder and now we will add a code snippet at a specific place where you want to add a continue shopping button.
Let’s first add for cart template.
Add the following code in child-theme/woocommerce/cart/cart.php file at line no. 149. It’s up to you where you want to display it.
Let’s add for checkout template.
Add the following code in child-theme/woocommerce/checkout/form-checkout.php file at line no. 21 or wherever you want to display it.
The Continue button will display at the very start of the checkout form as you can see in the above screenshots in the hook example.
Conclusion
So in this article, you have learned about how to add a Continue Shopping button on the cart and checkout page using the two methods. One is using the woocommerce hooks and the second is using the woocommerce template files.
You learned about displaying custom continue shopping button by using these woocommerce hooks like woocommerce_after_cart_table, woocommerce_cart_coupon, woocommerce_cart_actions. And also about how you can make copy files of the original woocommerce plugin and tells WordPress to utilize them.
I hope you understand the tutorial but if you still have any questions or queries please ask me in the comment section, I will try to respond to you as soon as possible.


