
In this tutorial, I will show you how to create a custom options page in WordPress using the WordPress action hooks and settings API. Creating a custom options page in WordPress is very easy and you can easily create it.
What is the Options Page in WordPress?
The options page feature allows us to add an extra admin page in WordPress where you can easily create new custom fields like input box, select options, color picker, textarea, media uploader, etc, and manage them.
You can customize all admin options pages in the WordPress dashboard area. You can also create sub-admin options pages underneath. All the data is saved in the wp_options table and you can access them globally.
So let’s start creating a custom options page in WordPress and add some fields to save data and access them.
Create a Custom Options Page in WordPress
To create a custom options settings page in WordPress, you must have knowledge of WordPress action/hooks and settings API and how to use them.
We will use admin_menu action hook and add_options_page(), add_menu_page(). add_submenu_page(), and settings API functions like settings_fields() and register_setting(), etc.
So let’s start with a step-by-step guide from scratch to create an options page in WordPress.
Step 1. Create a Custom Options Page Function
In this first step, we have to make a function for the custom options page and hook that function to tell WordPress this is an options page.
Create Options Page under Settings Menu
We will use the add_options_page() function to add a new submenu page to the Settings main menu. This function takes some parameters to define the page title, menu title, menu slug, capability, page content, and on which position we want to show it.
Syntax
See the following code to use the above function to create an options page under the Settings option.
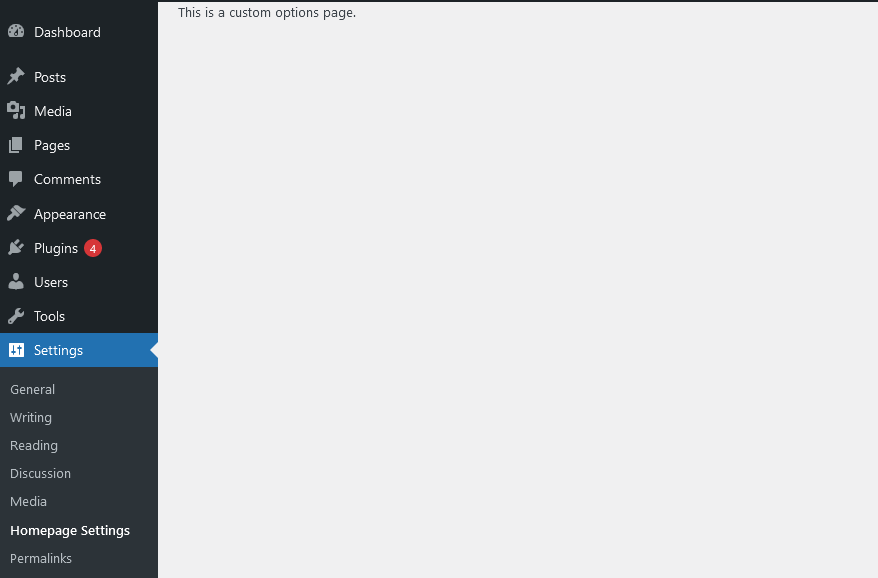
The above code will create a new custom options page under the main Settings admin menu in the WordPress dashboard area. And it will print the content from the function. See the following image for reference.
Now if you don’t want to show your custom options page under the main ‘Settings’ admin menu and want to create a separate admin menu then you have to use the add_menu_page() function instead add_options_page() function.
Create Top-Level Menu Page
To create the top-level menu page in WordPress, you just have to use the same code as above. You just need to replace the add_options_page() function and use the add_menu_page() function.
Have a look at the following code.
It will create a new separate admin menu page in your WordPress dashboard and the cool thing is that you can add the dashicons for the menu. You can also add a custom image icon from media, just add the image URL there.
So use one code from above one of them and save it in your functions.php file of child theme and save the code and check it, you will see the new options page.
Step 2. Add Form Fields with Settings API
Now in this second step, we will add some fields to our custom options page using the settings API to save and read the values.
Create Form and Define Settings API
Let’s make a form in the ‘my_custom_page_content‘ function that we have a callback in the previous step. The form will have an action to the “options.php” file and will also define the settings fields group name and section.
Add the above code in the page content callback function and save it. You will see the Heading of the page and the save button. Now we will add fields on this page.
Create Fields and Register Settings
Now we will add some fields in that form using the Settings API and register that setting. To add the fields in the custom options page, we will use the add_settings_field() function. It takes some parameters to define the field and what type of field, which we will see in the example code below.
After defining the settings fields, we will register those fields using the register_settings() function to show up on the page. You can also add the setting section heading using the add_settings_section() function.
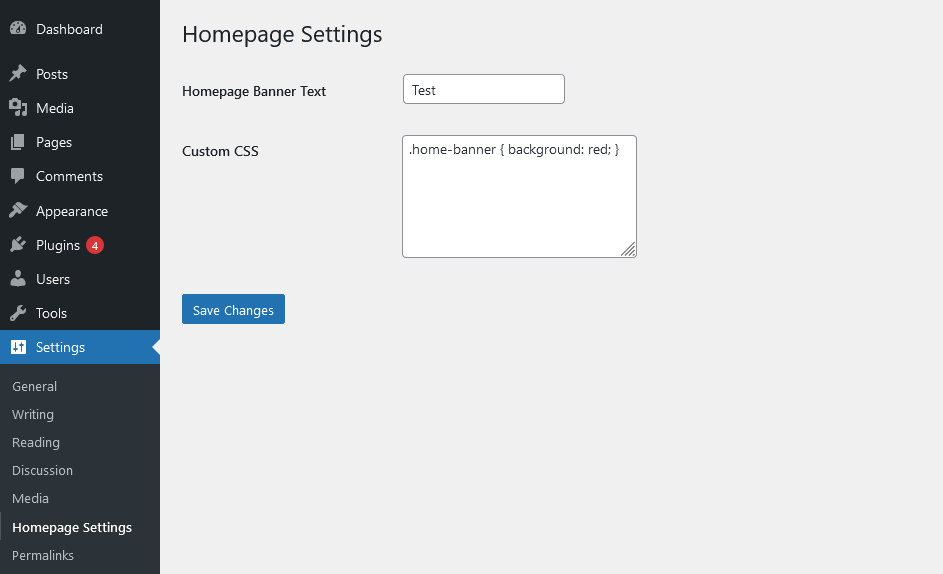
After saving the above code in your functions.php file you will see the form and settings fields and save button and you can save the value of these fields. Look at the following image.
Explanation what we did above in code
So in the above code, you can see we have first created a section function, you can create multiple by changing the id of it.
Then we have defined the settings section fields to callback the HTML structure of that fields, as for now I have created only two fields input type text and textarea but you can create as many by defining the type of the field.
And then we have to register those settings fields by sanitizing the fields using the ‘sanitize_text_field’ parameter. It will call the sanitize_text_field() WordPress function to make proper text and get rid of unknown strings and characters. You can also create a custom sanitization function.
Tip: You can optimize the above code as you want. If you have many fields for the custom options page then you must have to make the dynamic function call, so you don’t have to repeat again and again the same register and add settings functions.
For more about the WordPress settings API, you can check the official documentation here.
Conclusion
So in this tutorial, you learned about how to create a custom settings options page with the help of add_options_page() and add_menu_page() functions.
Then you also learned about how to make fields on that custom page using the settings API and save them and show the values of them using the get_option() function.
If you have any queries about custom functionality in WordPress then you can ask or you can hire me to make custom functionality for you as you want.


