Do you want to change the default Proceed to checkout button text on the WooCommerce cart page? For this, you just have to add the function hook in your child theme’s functions.php file and it will change the default text to your custom text.
So, in this tutorial, you will learn how you can change the proceed to checkout button text.
Let’s get started.
Change Proceed to Checkout Button Text in WooCommerce
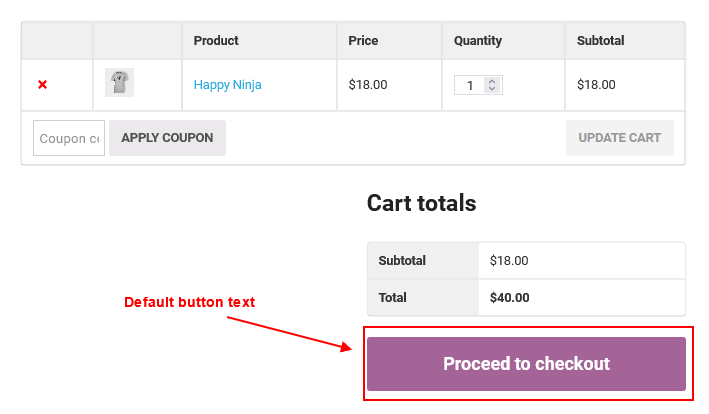
Before adding the code snippet, you can see where this button is located and what it looks like? So the button is located on the WooCommerce cart page below all cart items listed and shows the total price box. You can also change the position of this button as you want.
See the below image of the default proceed to checkout button on the WooCommerce cart page.
When you click on this button it will redirect to the WooCommerce checkout page and you can place your order by clicking on the Place Order button at the bottom.
You can skip this cart page step, which means if you want to directly redirect to the checkout page without going to the cart page then check this guide How to redirect to checkout after clicking on add to cart button?
OK. Let’s come to the main point.
Step 1: Open the functions.php file through the cPanel file manager OR Theme Editor in the admin dashboard (Appearance > Theme Editor)
Step 2: Add the following code to your functions.php file at the bottom.
// Change Proceed to Checkout Button Text on Cart
function woocommerce_button_proceed_to_checkout() {
	?>
	<a href="<?php echo esc_url( wc_get_checkout_url() );?>" class="checkout-button button alt wc-forward">
		<?php esc_html_e( 'Go to Checkout', 'woocommerce' ); ?>
	</a>
	<?php
}
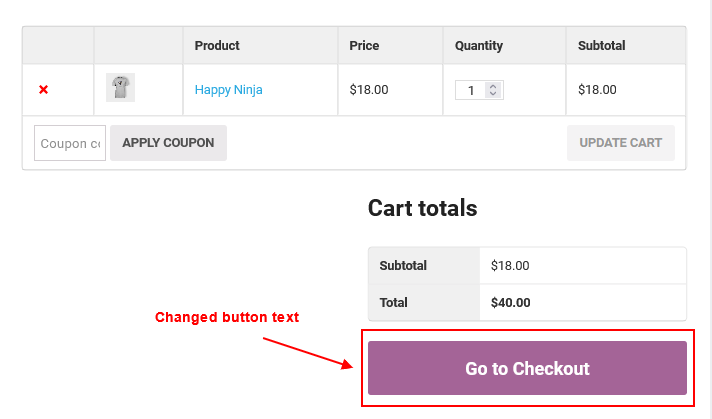
Step 3: Save the file and now try to add a new product to the cart and check the cart page. You will see the Proceed to Checkout button text has been changed. You can see this in the image below.
Note: This woocommerce_button_proceed_to_checkout() function directly calls from WooCommerce core files. You don’t need to add any action or filter hook to run this. Actually, this works as a pluggable function, just add a function from the core into your functions.php file and it changes your proceed to checkout button text with also an image.
Change Proceed to Checkout Button Text with Image or Icon
If you want to add an image/icon with text then you can also do that. You just have to add the tag with the src attribute before or after proceeding to checkout button text and it will be shown on the frontend.
To add the image with the proceed to checkout button on the cart page, you have to add the <img> tag with the image path source.
// Change Proceed to Checkout Button Text on Cart
function woocommerce_button_proceed_to_checkout() {
	?>
	<a href="<?php echo esc_url( wc_get_checkout_url() );?>" class="checkout-button button alt wc-forward">
		<?php esc_html_e( 'Go to Checkout', 'woocommerce' ); ?>
		<img src="/your-image-path" alt="proceed button image" />
	</a>
	<?php
}
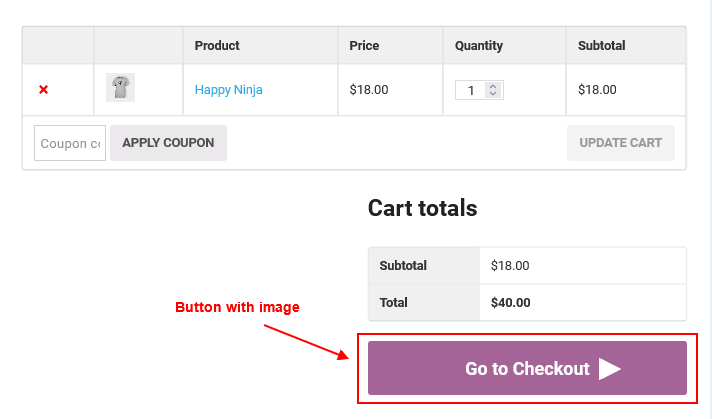
The above code will show the image after the text. You can add an image where you want to show it as per your requirements. See the below image with proceed to checkout button image/icon.
Related Links:
Conclusion
In conclusion, customizing the “Proceed to Checkout” button text in WooCommerce is a straightforward process that allows you to tailor the shopping experience on your website to better suit your brand or messaging preferences.
By utilizing the woocommerce_order_button_text filter in your theme’s functions.php file or a custom plugin, you can easily replace the default text with your desired wording.
FAQs
Yes, you can replace the button text with any desired words or phrases by modifying the provided code snippet in the functions.php file.
No, changing the button text using the recommended method does not impact the functionality of the checkout process. It is a simple cosmetic adjustment.
Certainly, you can either remove the custom code from the functions.php file or deactivate the custom plugin to revert to the default “Proceed to Checkout” button text.
Yes, the provided method is a standard and stable way to modify the button text, and it should persist through WooCommerce updates. However, it’s always wise to check after major updates.
While the provided code snippet changes the text globally, you can implement additional logic within the function to conditionally change the button text based on specific criteria, such as page or user roles. Advanced customization may require more complex coding.

