Hey! If you are looking for the solution to add custom post status for post type in WordPress then you are in right place.
In this tutorial, we will see how we can register a custom post status in WordPress using the plugin and programmatically. We will also see how to add custom post status to quick edit post functionality. Let’s have a look at the step-by-step guide.
What is WordPress Post Status?
Post status is like a tool that tells WordPress to store the blog post in a different stage of a post in WordPress. It handles the posts to be visible on your website.
It will not allow the posts to show at the front end until you make it Publish status. But suppose you don’t want to publish the post immediately then you can set the status as Draft.
By default, WordPress comes with the following post status to handle the blog posts.
- Draft
- Pending Review
- Posts Scheduled
- Private
- Trash
- Inherit
So these are the default WordPress post status but along with these, you can also register a new custom post status using the register_post_status() function.
Let’s add the custom status in WordPress using the plugin and programmatically.
Register Custom Post Status Programmatically
In this method, you have to add the action hook in your WordPress child theme and save it. We will use a register_post_status() function to register the new custom post status for blog posts in WordPress. And then have to append the new status in the select dropdown option using jquery.
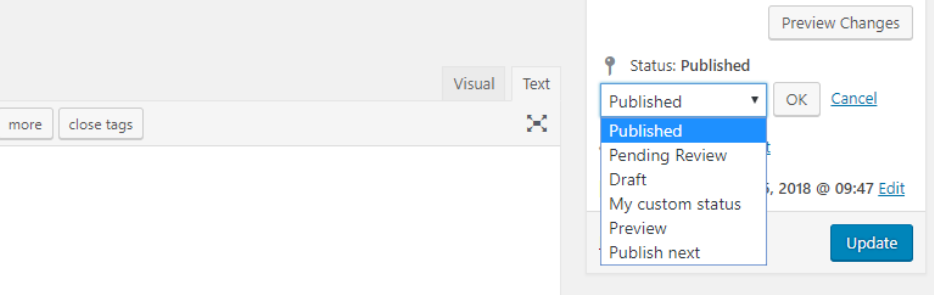
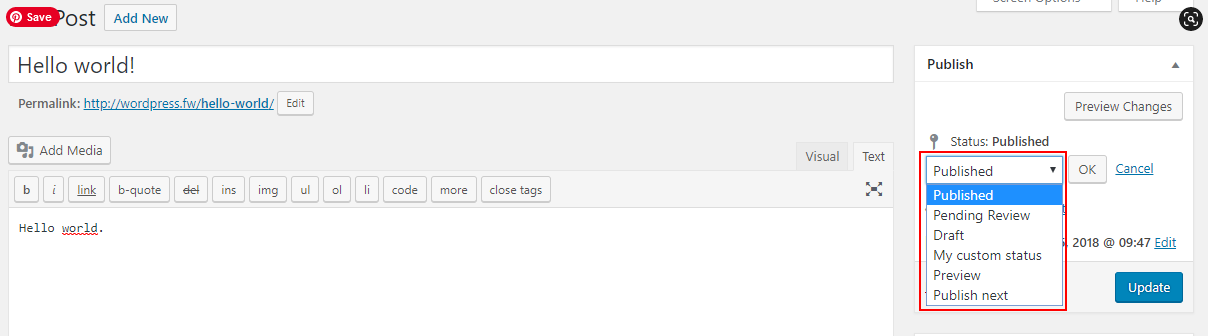
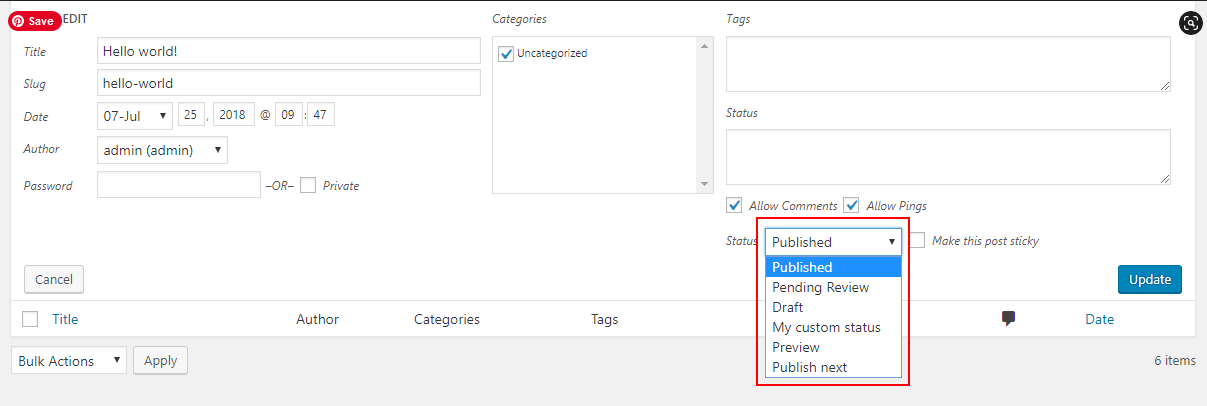
The above code will register the custom post status for your blog posts. You can see in the Publish meta box on the right side of add or edit post.
Now, we have to add the jquery trick code to append the new status in dropdown options. Because WordPress is not allowed to use the WordPress custom registered post status on the admin side.
Also See: How to Add jQuery Script to WordPress?
To achieve this you have to use the admin_footer-post.php action hook. It will only process the jquery code for your default posts and custom post type in WordPress. See the following code for an example.
So above both code scripts will register the custom post status in WordPress and you can use it to change the status for any post.
Now let’s see how to add custom post status with a plugin.
Register Custom Post Status with Plugin
In this method, we will register new custom status with a plugin. You need to install an Extended Post Status plugin.
This plugin provides the option to add new statuses to the backend and define the system’s relevant status settings. You can add/edit statuses just as categories or tags. All statuses are available for all your post types.
Follow the below steps to install this plugin and create new custom status in WordPress.
Step 1: First thing, you need to install the Extended Post Status plugin. Check this guide on how to install the WordPress plugin?
Step 2: After installation, you will see a new menu item “Extended Post Status” located in the settings admin menu.
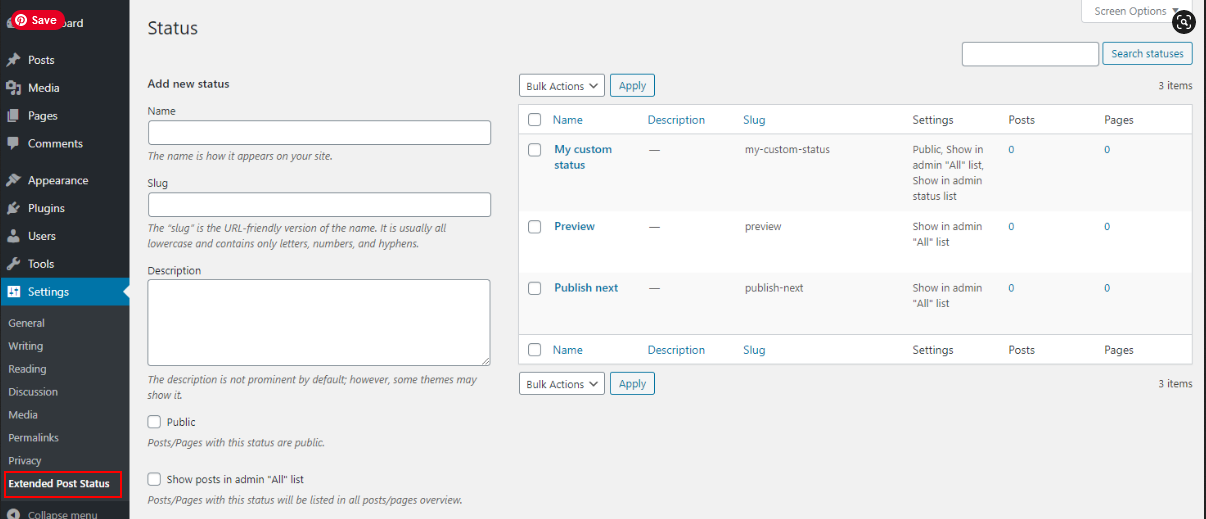
You can register here the new custom post status which you want to create and it will show in the status dropdown options selection.
Step 3: Now here you can see all registered statuses. You can set any status to post as you want.
Step 4: Using this plugin, will also show the registered post statuses option list in the quick edit post section.
But if you are registering your custom status programmatically then you have to write the separate action hook function, which we will see next.
Register Custom Post Status Programmatically to Quick Edit
As I said, if you are using the plugin to register the custom status in WordPress then that plugin will show that status option in the quick edit section.
But if you are doing it programmatically then you need to add another action hook to show that status option list in the quick edit section. You just need to add only the hook function for jQuery code and we will use admin_footer-edit.php action hook.
Let’s see the following example code.
The admin_footer-edit.php action hook will process the code for default WordPress Posts and Pages and also for the custom post type.
Conclusion
So in this tutorial, you learned how to register a new custom post status using the plugin and programmatically. The plugin you can use anyone but in this tutorial, we used Extended Post Status.
You also learned how to show the custom post status in the quick edit section to change the post status quickly.
Hope you like it. Please share it with your friends or social media. Or if you have any questions please let me know in the comment section, I’ll respond to you as soon as possible.


