If you are looking for a way to add a custom menu item to your my account page of woocommerce store, then you are in the right place.
In this tutorial, we will learn about how to add a custom tab menu to the My Account page of woocommerce. For this, you have to make action/filter hooks to allow woocommerce to add a new menu item.
My Account page is a dashboard view for customers in their woocommerce store’s account. On this page, customers can view the order details, editable address, payment details, and of course logout button.
If you are a new customer in the store then it will ask you to create an account and then log in. So after login, you will see the customer dashboard My Account page like the following image.
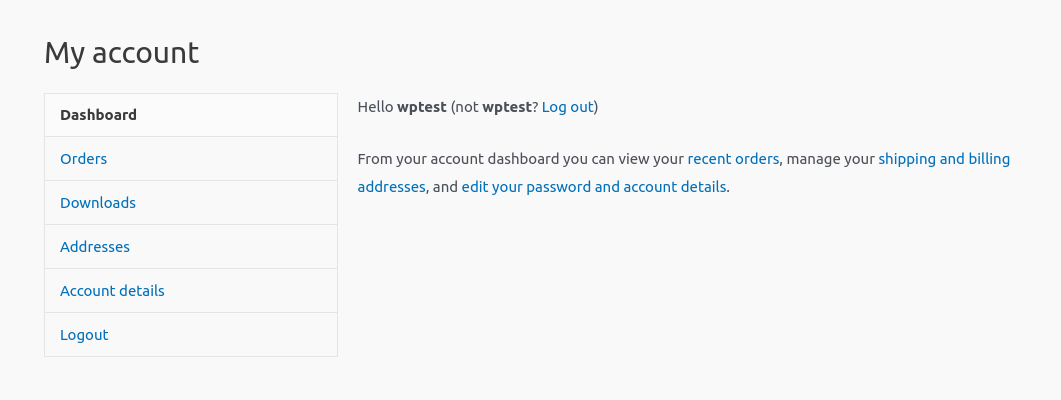
You can see in the above image of the My Account page and how its menu looks by default in the Astra theme.
We will use one of the best multipurpose Astra theme for this tutorial for customization. It is a woocommerce-ready theme and you can easily build your online store using this theme. It is also easy for customization. If you need help with customization then contact me.
See Also: How to Install WordPress Theme?
So let’s get started to add a custom menu item to my account page of woocommerce.
Add Custom Menu Item in My Account Page
To add a new menu item in My Account in woocomemrce, you first have to make filter hook and action hook functions that will allow adding a new label menu and its URL endpoint and content of the custom page.
See Also: How to Add WooCommerce Cart Icon in Menu with Item Count?
Add Custom Menu Link
To add the custom menu label link, we will use the woocommerce_account_menu_items filter hook. It will add the custom menu link to the My Account page. This same filter hook you can also use to remove the menu item from the My Account page.
Add the above code to your child theme’s functions.php file and save it. And you will see the Custom Menu link visible on your My Account page. You can customize the code and change the order of the menu as you want.
Wait!!!
But still, this will not work yet when you try to click on the Custom Menu, it will show you a 404-page error. To fix this, you have to another action hook function to register the permalink.
Register Custom Permalink Endpoint
To register the permalink endpoint, we will use the init action hook function, it will rewrite the new menu’s endpoint.
Now when you click on the Custom Menu link it will not show the 404-page error. It will show the Dashboard menu page content. Now we will make another action hook to show the content for the custom menu page.
Show Content for Custom Menu Link
To show the content for the Custom Menu link, we will use the woocommerce_account_{ENDPOINT NAME}_endpoint hook, where {ENDPOINT NAME} refers to the name of the custom endpoint that we have created in the above step.
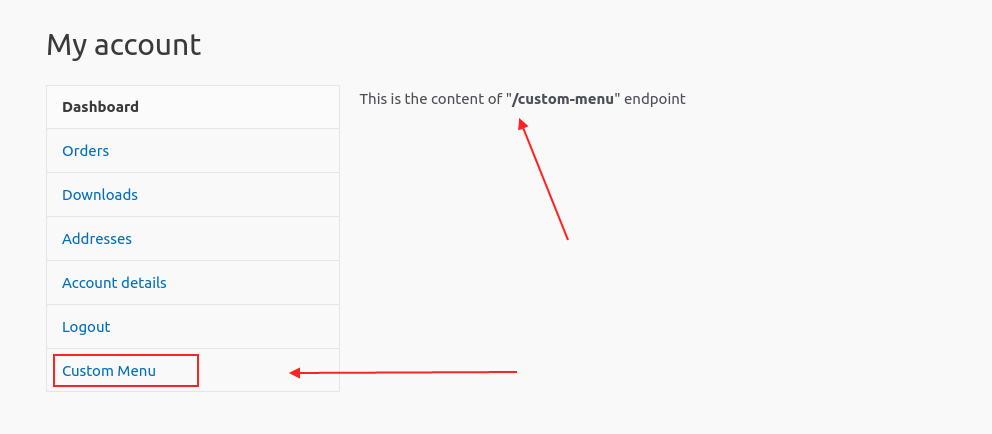
Now save you’re all the above code in your active theme’s functions.php file and now when you click on the Custom Menu tab you will redirect to the “/custom-menu/” URL and the content for this endpoint will be shown. See the following image for reference.
See Also: How to Get WooCommerce Page URL Dynamically?
Conclusion
So in this tutorial, you have learned step by step how to add a custom menu item to my account page of woocommerce store.
First, we added a custom menu link in the existing menu using the filter hook and then we made another hook function to rewrite the endpoint and show the content for the custom endpoint.
I hope you liked it. Please share with your friends and or in groups. If you have any queries please do let me know in the comment section, I’ll try to help you with that, thanks.
See Also: How to Add Password Strength Meter in WooCommerce?

