
In this tutorial, we will learn about how to create a contact form in PHP and send an email notification. We will also cover how we can save data in the MySQL database as well.
A contact form is like a communicator between two persons. It will transform the query from one to another. So almost every website has a contact us form to communicate with the website’s owner. It doesn’t matter what type of your website, it could be a blog, news, social platform, forum, store, or any other.
The contact form helps your visitor to communicate with the website administrator to ask for any information, suggestion, queries, or if they are facing any issue on your website. With the help of a contact form, visitors tell you the exact problem they had.
Even sending the email, you can also connect your contact form with the database and save all the requested using PHP. And can access them from the database using the PHP code.
So let’s start to create a simple ‘contact us‘ form with PHP and save the data in the database and send an email notification to the site’s owner.
Recommend tutorial: How to Install PHP on Windows, macOS and Linux?
Create HTML Structure of Form
First of all, we need to create an HTML form. So create a file ‘index.php’ and add the basic structure of HTML doctype then add the below form code inside the file. We created a .php extension file because later we will also insert the PHP code in this file.
The form has a basic structure of HTML tags and form control attributes. And also has input fields for Name, Email, Subject, and Message and one submit button to send the email and save the data into the database.
You can also have an image field to send screenshots to the site owner. For this, you have to add image upload functionality in PHP code.
Recommend tutorial: How to Upload Images or Files in PHP?
index.php
As you can see the above HTML form has all the required fields that are we need to create a simple contact form with PHP and MySql.
Important Notes:
1) Make sure the form tag has the method attribute and action attribute. These attributes are required to submit the form and save the data. The method attribute is used to pass the data while submitting the form, it can be GET or POST.
2) Please double-check with your input fields have a name attribute. Because it is required to get the value of a specific input field in PHP code.
Design the HTML Form
Now let’s add the style to our HTML form. We already have assigned the ID or Class to all fields but you can change it as per field convention.
Create a new file called ‘style.css’ and add the following CSS code in this file. After saving this file, link style.css file in index.php file using the <link> tag.
style.css
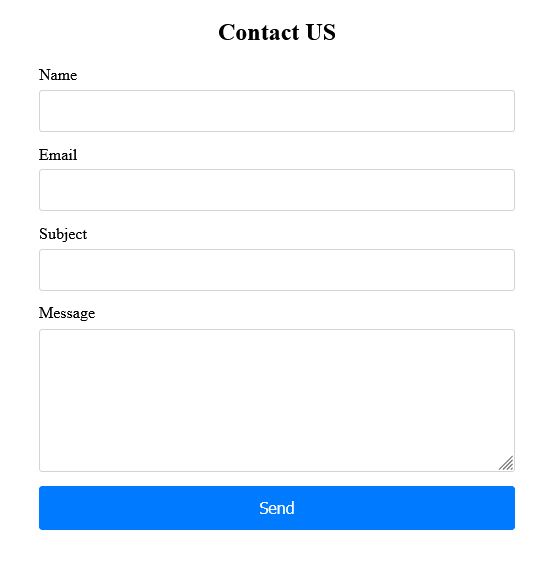
After designing adding the above CSS style, your form will look like the below image. It is just for demo purposes but you can design it as per your requirement.
Configure the MySQL Database
In this step, we will configure the MySQL database and make a connection between our PHP app and the database. Then after a successful connection, we can store the requested queries into the database table.
Create a ‘db_connection.php‘ file that we will add database detail in this detail and make a connection between PHP and MySQL.
db_connection.php
Create the Contact Form PHP Script
Now, we will create new .php file called ‘form-submit.php‘, you can give any name to it.
In this file, we will grab all the input fields value and then validate them. We have added the server-side validation code the validate the fields but you can also add the client-side validation using the ‘required’ attribute in the input field like the following example code.
The above line of example will don’t allow to submit the form without filling the fields value, because it will check on the client-side.
Recommend tutorial: How can I Prevent SQL Injection in PHP?
OK after validation, we will make functionality to store the data into the MySQL database table and then send an email to the site’s administrator.
form-submit.php
The above code will save your requested data into the MySQL database to keep the queries on track. You can also add more columns to your table based on the responses.
As I said above it will check server-side validation, if everything is correct then it will proceed to store the data queries into your database table.
Did you notice that we have added the ‘send_mail.php’ file but we haven’t created it yet? So let’s create it to work all code smooth and clean.
Create Send Mail PHP Script
In this step, we will create a PHP mail script to send an email. We will use it with our code, so visitors can communicate with the site’s administrator.
By using the PHP mail function, it will send the user’s queries directly to the site admin through email. The site admin will receive all the details about queries in his own email.
So let’s create a ‘send_mail.php‘ file and add the following PHP script and then save it. Make sure the filename is correct as you will add it into the above code.
send_mail.php
OK, after adding the all above code, now you have to add a couple of code lines in your main file (index.php). These lines will return the errors or response messages. If there was an error then it will list all the errors and if everything was good then it will return the success message.
So add the following lines of code just before the <form> tag in the ‘index.php’ file.
That’s it!!!
So add all the code together and you can modify it as per your requirements and then run the PHP code. I hope it will help you with some ideas and you can also extend the code functionality inside it.
Conclusion
So in this tutorial, you learned about how to create a simple HTML form and design it using the CSS style and then made a PHP script to validate the input fields and store them into a database. And we also covered how to send an email to the site’s owner using the PHP contact form.
If you still have any questions, or topics that should cover in this tutorial, please let me know in the comment section below. I would like to hear suggestions from you.


