WordPress plugins are additional features to enhance extra functionality in our WordPress website. We can activate and deactivate it from the admin dashboard. To install a WordPress plugin, you need to upload your plugin in the “wp-content/plugins” folder.
Installing WordPress Plugin is the basic thing that every WordPress blogger should know about it and how to install, and use it. It is easy to install the WordPress plugin and you can learn here from beginner to advanced step by step.
So Let’s get started!!!
In this article, we will learn three ways to install WordPress plugins:
Search and Install Plugin
In this method, we will search for the plugin in wordpress.org’s plugin directory and, after that install and activate it. We will go through step by step with the help of the below images.
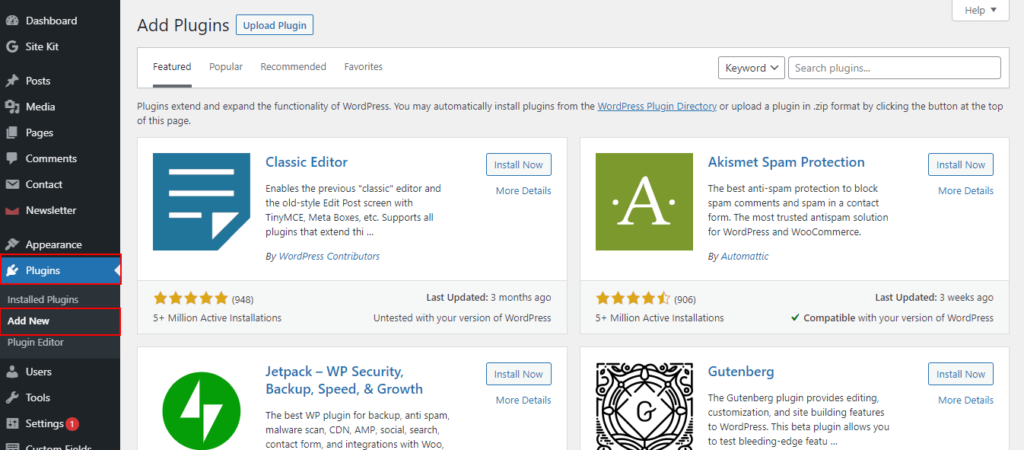
Firstly, you need to log into your admin dashboard. And then click on “Add New” under the “Plugins” option from the sidebar. You will see the below screen.
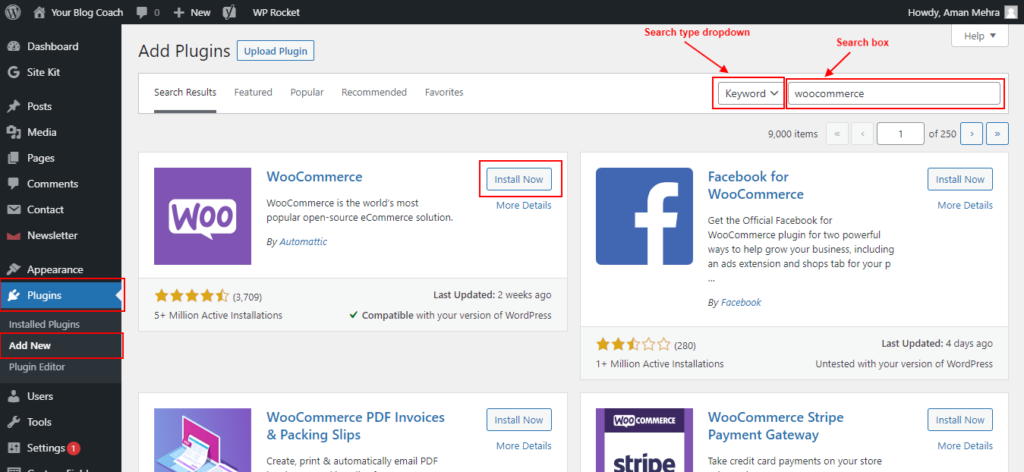
Then, you have to search for your plugin in the search box on the top right side. It will show you the list of plugins related to your search. You can search with the “Keyword”, “Author”, and “Tag” options selected from the dropdown near the search box and it will show the result according to your selection.
NOTE: The search result will show only free plugins that are hosted by wordpress.org.
From the result, select the plugin that you want to install on your WordPress and then click on the install button. It will take some time depending on your internet connection. Please wait until successfully installed. This action will make the folder of the plugin in your “wp-content/plugins” directory.
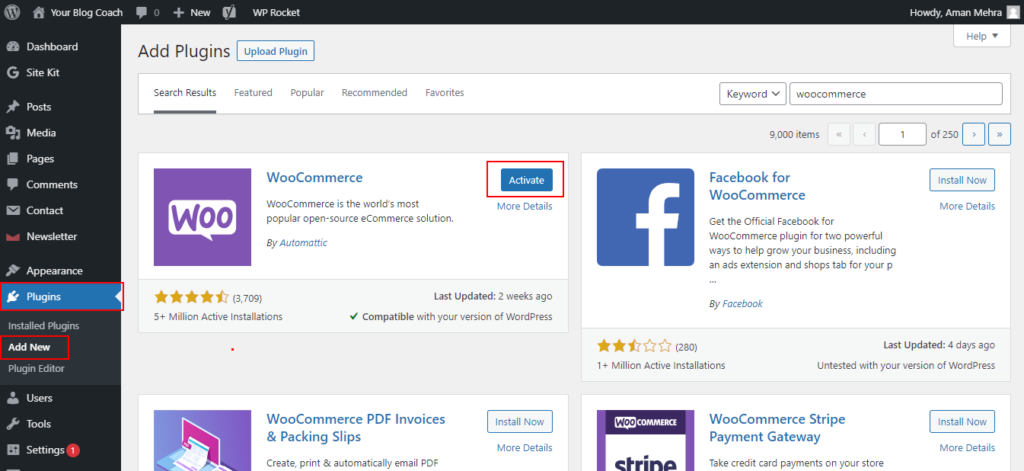
After successfully installation, you will see that the “Install” button changes to “Activate“. And click on this “Activate” button to make it work for your WordPress website. You can deactivate it later from the Installed Plugins list.
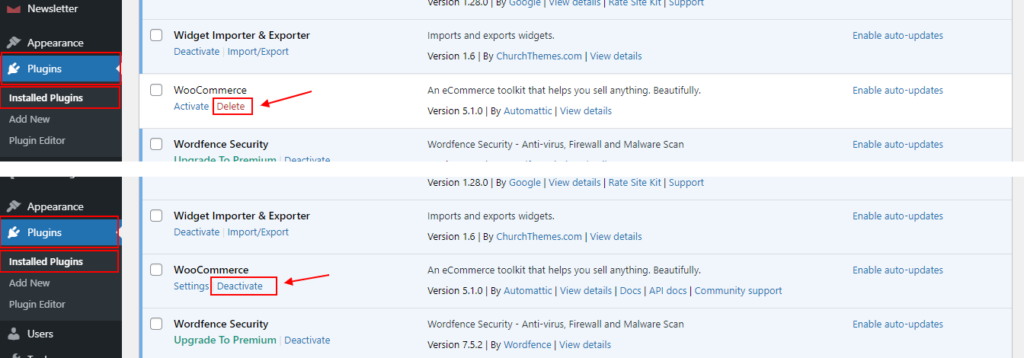
Now you can use the plugin that you just installed from the above guide. If you realize that, the plugin will not work according to your requirements then you can “Deactivate” it and “Delete” it properly from the Installed Plugins list.
Manually Upload and Install Plugin
In this method, we will search for the plugin from the Google or WordPress plugin directory and download it as a zip file. After downloading the zip file will upload as a plugin file from the upload section. Check the below image.
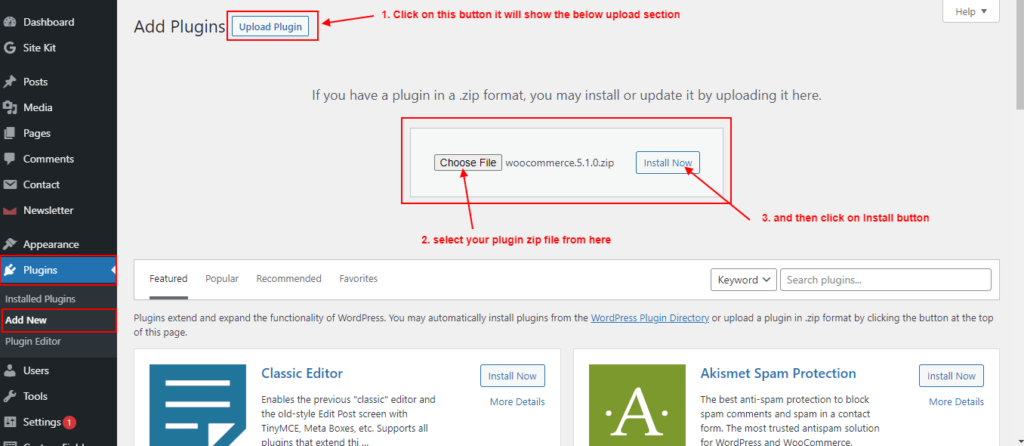
From the above image, first, you have to click on the “Upload Plugin” button it will show you the upload section. From there select the download zip file of the plugin and click on the Install button.
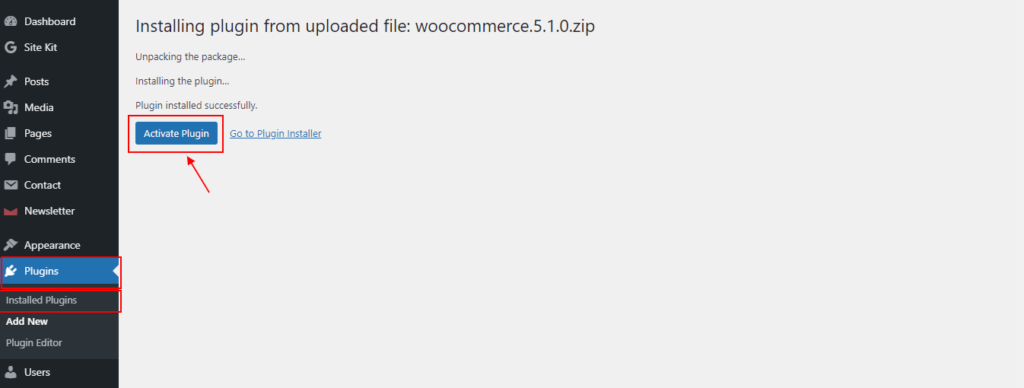
The next page will ask you to activate the plugin, then click on the “Activate Plugin” button. You can do it later from the Installed Plugins list.
NOTE: With this method, you can also upload the premium plugin.
Install Plugin Using FTP/SFTP
In some cases, the hosting provider doesn’t allow the installation of the WordPress plugin from the admin dashboard because of file restrictions. So, in that case, you need to add a plugin through FTP access.
So, first of all, download the plugin from the directory or any other website (the file should be a zip file). After downloading extract it on your computer it will give a folder of the plugin.
Now we need FTP access. So, login into your FTP account and navigate to this path “wp-content/plugins”. In this location upload your extracted folder here.
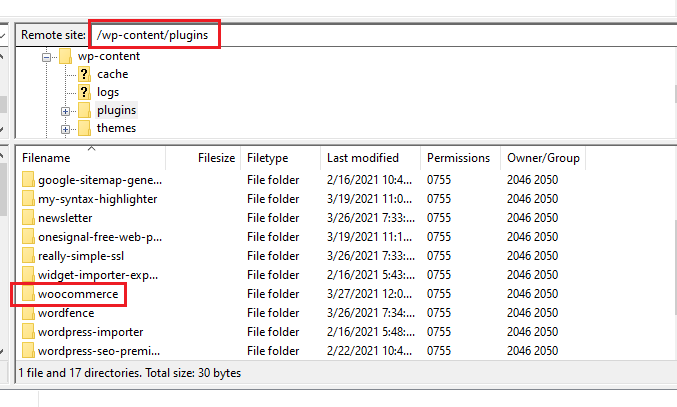
After successfully uploading, you will see your plugin in the Installed Plugins list and you can Activate it from here.

That’s it. You learned the three best ways to install the WordPress plugin. If you have any queries please ask in the comment, and I’ll solve your query.

