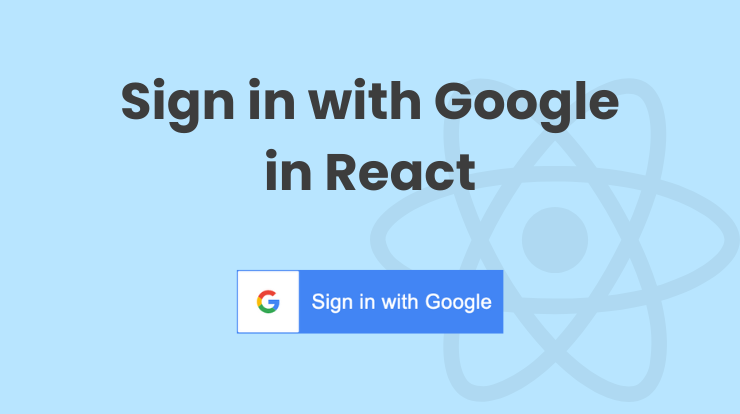
In this tutorial, we will learn about how to implement google API to make a Sign in with Google button and add it to in react application.
Google provides us OAuth client library to make a login system on a website or web application. So you can use this library allows users to sign in with their Google account without signing up.
Firstly, we create a google OAuth Client Id from the google developer console because we need that Id to integrate Google + React together. Then we can get the user details like name, image, and email while logging through a google account.
So let’s get started with step by step guide to make the sign-in functionality in react application using the google OAuth client library.
Get Google OAuth Client ID and Client Secret
You have to follow the below steps to create a new google project application in your developer console account and then get the OAuth client ID and client secret.
Step 1: Go to the google developer console and login with your google account.
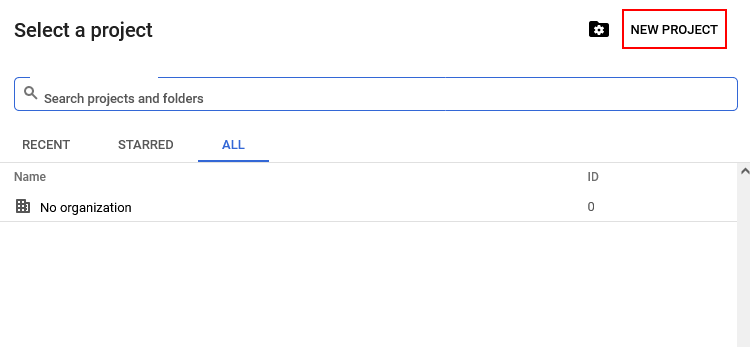
Step 2: To create a new project in google console, click on the New Project button. You can also you the existing project if you have one.
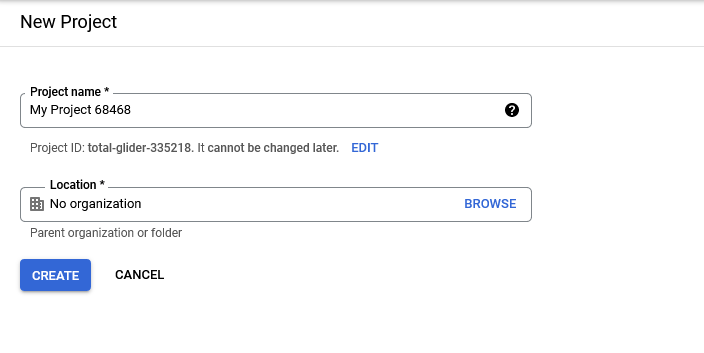
Step 3: After clicking on the “New Project” button, it will ask for your Project name and Location, so fill it and click on the Create button.
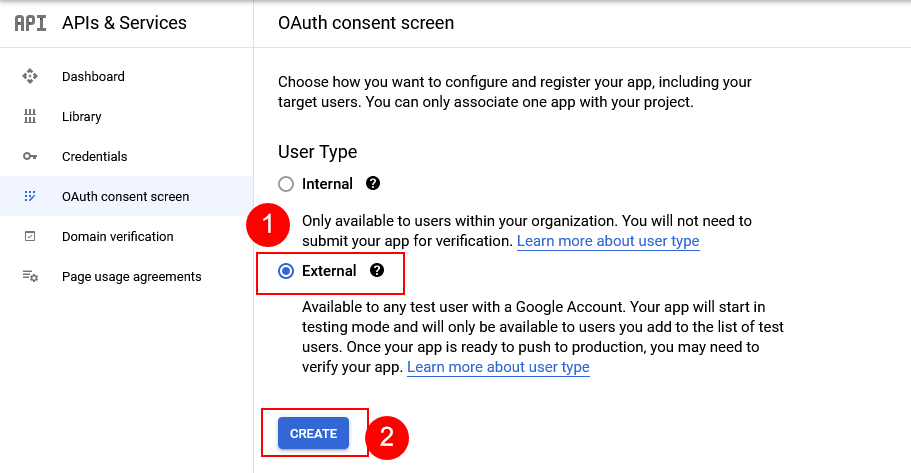
Step 4: Now navigate to the Credentials menu from the left side and click on the Configure Consent Screen button. Or you can go through APIs & Services menu on the consent screen.

On the OAuth consent screen it will you User Type, so select the External field and click on the create button.
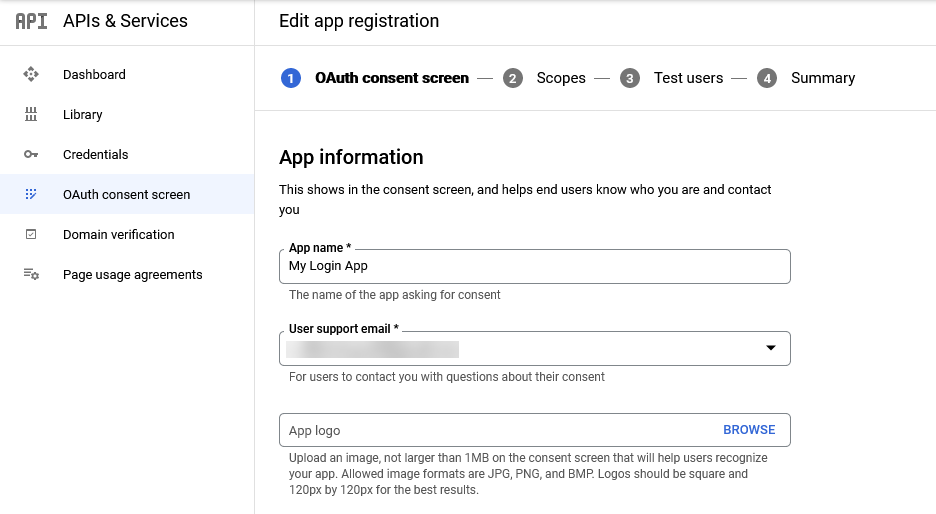
Step 5: After that, you will see the app registration page and you have to fill in the required fields. Go through each tab and fills the fields and then Save it.
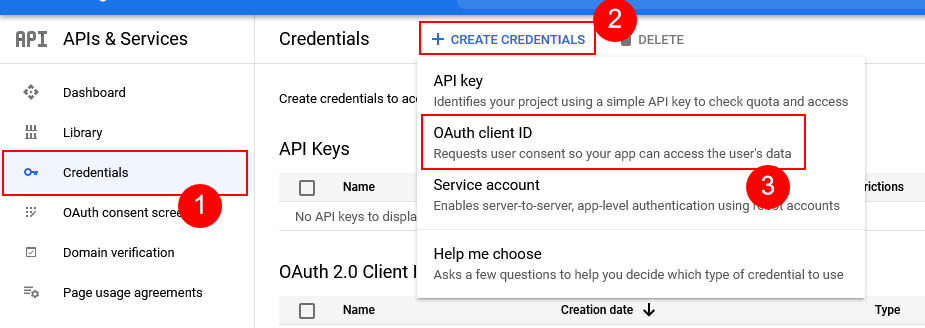
Step 6: Now select the Credentials menu from left side and click on the “+ Create Credentials“. You will see more options under this, click on the OAuth client ID.
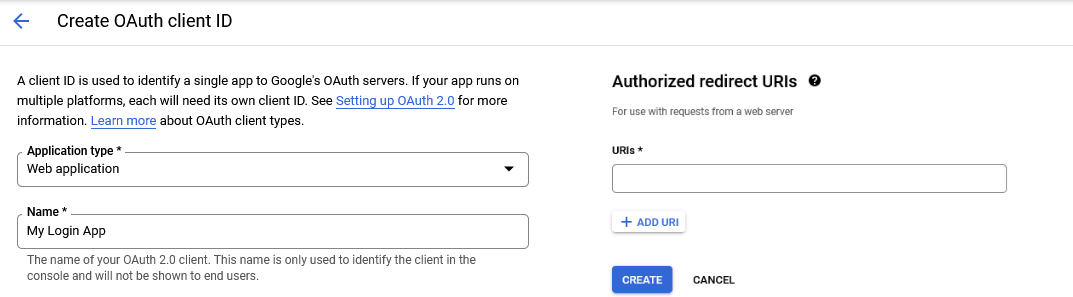
Step 7: Select the application type as Web Application and enter the Name, Authorized JavaScript origin and redirect URI. Redirect URI is used to redirect your website after successful login.
Step 8: After clicking on the Create button, it will show you the Client ID and Client Secret that we used to make the sign-in button functionality with google and add it to in react application.
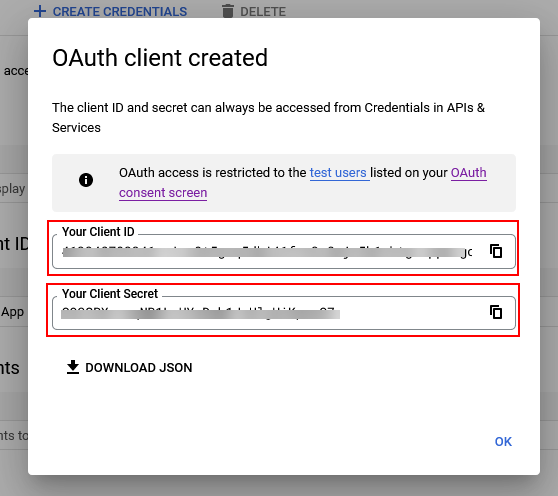
Now you have successfully created a google app and created the google OAuth client ID and client secret keys.
If you facing any issues while creating the google app. Then let me know in the comment section, and I’ll help you with that.
Add Sign in with Google Button in React Application
Now we have a google client ID and now we will integrate google with react using this client ID and make singin or login button to authenticate the users.
Let’s get started to create the react application and add the google sign-in button to it.
See Also: How to Install ReactJS and Create React Application?
Create React Application
Let’s first create the react application using the following command. You can skip this step if you already have installed react project.
Install react-google-login Package
We will use the react-google-login package to build the “Sign in with Google” button. So install it using this command.
OR
Create Google Login Button Component
To create the Sign in with Google button, we will create a function component file called GoogleLoginButton.js. You can make components in the /components folder to make clean and stack code.
In this component, we will import the react-google-login package and then use its GoogleLogin and GoogleLogout components. See the following code of the function component of the login button.
In the above file, we first imported the GoogleLogin and GoogleLogut components of the react-google-login package.
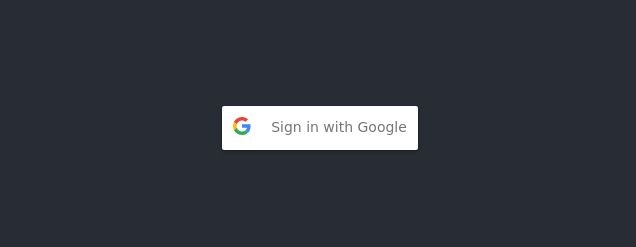
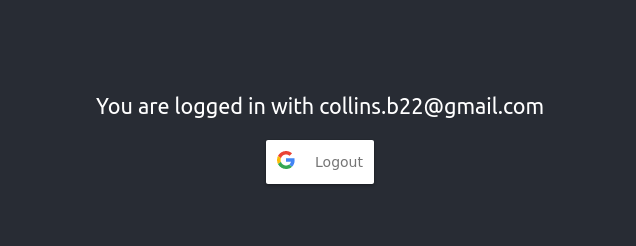
We used the <GoogleLogin /> component to make the “Sign in with Google” button with required props like clientId, onSuccess, onFailure, and buttonText function. For the “Logout” button we used the <GoogleLogout /> component.
Then we have declared some states using the useState() hook to manage the login or logout process. This means if the user logged in success then hides the login button and shows the logout button.
Also add some inline-style to paragrapgh to change the size. You can also use the Bootstrap to style your component and make look better.
Also, show the basic info for logged-in users. You can use the info as you want, there is also a token in response to validating the user with the backend process. All code is up to you and how you manage it.
Note: Don’t forget to change the CLIENT_ID with your google Client ID that you have generated above.
Use Google Login Button Component in App.js
Now we will use this login button component in the App.js file or where you want to use it like a login page or anywhere.
So import the GoogleLoginButton file in App.js and use the <GoogleLoginButton /> component in the return() function. See the following code for reference.
All Done!!!
Now time to test ours react application!
Start React App
To test the react application, you have to start it using the following command. It will start the development server and open your application in the browser automatically.
When your application starts and runs in the browser, it will show you the login and logout buttons like the following image.
Hope it was helpful for you and you liked it. If you have any queries please do let me know in the comment section, I will respond to you as soon as possible.
See Also: Login with Google Account in PHP


