Hello friends, In this tutorial, we will see how we can customize the WooCommerce checkout page to change the order of checkout fields.
As you know WooCommerce is a great solution for an eCommerce platform to sell any type of product with default setting options. Sometimes the default order of checkout fields in WooCommerce might not align with your business needs.
But don’t worry! you can easily customize the WooCommerce checkout page to rearrange the order of checkout fields. You can enhance the user experience by customizing the product page, cart page, checkout page, order detail page, etc.
Understanding the Checkout Fields
Before we start rearranging the order of checkout fields, let’s get to know more about WooCommerce checkout fields.
WooCommerce, being a highly customizable e-commerce platform, provides a range of default fields such as billing details, shipping information, and payment options. Each of these fields plays a distinct role on the checkout page.
By default, WooCommerce has 4 separate groups to display the checkout fields. See the following list of 4 groups.
billing– For Billing Address,shipping– For Shipping Address,account– For Account Login,order– For Additional information.
In WooCommerce, the checkout fields are managed through actions and filters. The actions we used to initiate the processes, and the filters we used to modify the data.
WooCommerce provides many actions and filter hooks for the checkout page to customize like adding a custom field, removing shipping or billing fields, changing coupon button text, changing the place order button, etc.
But today we will explore and use the woocommerce_checkout_fields filter hooks to change the order of WooCommerce checkout fields by setting up the priority parameter.
woocommerce_checkout_fields Filter
function custom_checkout_fields_order($fields) {
	// Manipulate the $fields array as needed
	return $fields;
}

add_filter('woocommerce_checkout_fields', 'custom_checkout_fields_order');
This filter hooks opens the gateway to the checkout fields array and you can customize them as you want.
Change Order of Checkout Fields
Now we have an understanding of woocommerce_checkout_fields filter hooks, let’s dive into the customization of the checkout page.
The process involves altering the array to rearrange the checkout fields as per your business requirements. You can set the position of fields at the top, into another column, into another group, etc, You can also add conditions on the checkout fields.
Move Checkout Fields at the Top
Want to change the position of the email and phone field of the billing address at the top of the checkout form? No problem.
With a few lines of code, you can change the order of WooCommerce checkout fields and create a seamless flow. See the following code example.
function custom_checkout_fields_order($fields) {
    // change the email and phone field position at top
    $fields['billing']['billing_email']['priority'] = 5;
    $fields['billing']['billing_phone']['priority'] = 6;

    return $fields;
}

add_filter('woocommerce_checkout_fields', 'custom_checkout_fields_order');
Add this code snippet to your theme’s functions.php file. I recommend you use the child theme‘s functions.php to prevent the changes from being lost while updating the theme.
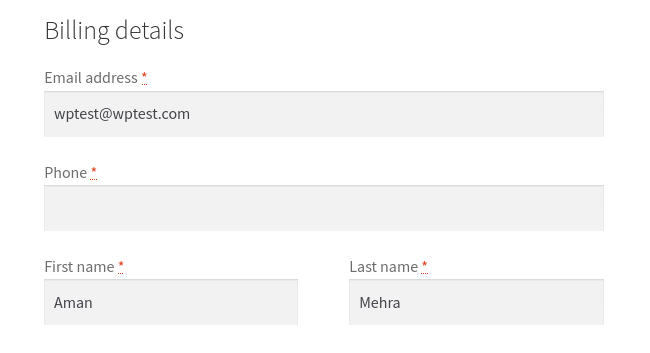
In the above example, we changed the position of the email and phone fields of the address fields by changing the value of the priority parameter.
You can also add new checkout fields and set the position by priority parameter wherever you want and suit your business.
If you want to set any field at the top, just make sure that the priority of that field is less than 10. You can see the default priorities of checkout fields in the following table.
Default Checkout Fields Priorities
Here are the default priorities of checkout fields provided by WooCommerce.
Billing Address Fields Priorities
| Name | Priority |
|---|---|
| billing_first_name | 10 |
| billing_last_name | 20 |
| billing_company | 30 |
| billing_country | 40 |
| billing_address_1 | 50 |
| billing_address_2 | 60 |
| billing_city | 70 |
| billing_state | 80 |
| billing_postcode | 90 |
| billing_phone | 100 |
| billing_email | 110 |
Shipping Address Fields Priorities
| Name | Priority |
|---|---|
| shipping_first_name | 10 |
| shipping_last_name | 20 |
| shipping_company | 30 |
| shipping_country | 40 |
| shipping_address_1 | 50 |
| shipping_address_2 | 60 |
| shipping_city | 70 |
| shipping_state | 80 |
| shipping_postcode | 90 |
Account Fields Priorities
| Name | Priority |
|---|---|
| account_password | no priority |
Also Read: How to Add Custom Menu Item in My Account Page in WooCommerce?
Also Read: How to Remove Menu Item in My Account Page in WooCommerce?
Order Fields Priorities
| Name | Priority |
|---|---|
| order_comments | no priority |
Adjusting Checkout Fields in Columns
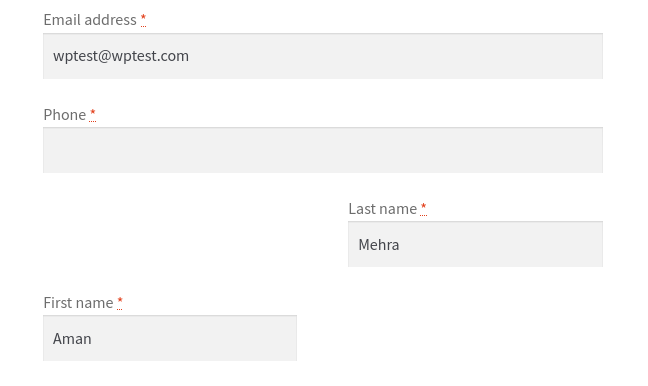
When changing the order checkout fields, you may encounter unexpected outcomes, such as when switching the first name and last name fields. In such cases, the displayed result might not align with your expectations.
function custom_checkout_adjust_fields_columns($fields) {
	// Swap the billing's firstname and lastname fields
    $fields['billing']['billing_first_name']['priority'] = 20;
    $fields['billing']['billing_last_name']['priority'] = 10;

    return $fields;
}

add_filter('woocommerce_checkout_fields', 'custom_checkout_adjust_fields_columns');
See the following image of the above code output.
To fix this column adjusting issue while changing the order of checkout fields, we will change the predefined WooComerce CSS classes. WooCommerce comes with the following 3 styles of CSS classes that are used on fields on the checkout page.
form-row-first– first, half-widthform-row-last– last, half-widthform-row-wide– fullwidth.
Let’s have an example of changing CSS classes of checkout fields to make a well-organized and visually appealing checkout process. We will use the same woocommerce_checkout_fields hook.
function custom_checkout_adjust_fields_columns($fields) {
// Swap the billing's firstname and lastname fields
$fields['billing']['billing_first_name']['priority'] = 20;
$fields['billing']['billing_last_name']['priority'] = 10;
$fields['billing']['billing_first_name']['class'][0] = 'form-row-last';
$fields['billing']['billing_last_name']['class'][0] = 'form-row-first';
return $fields;
}
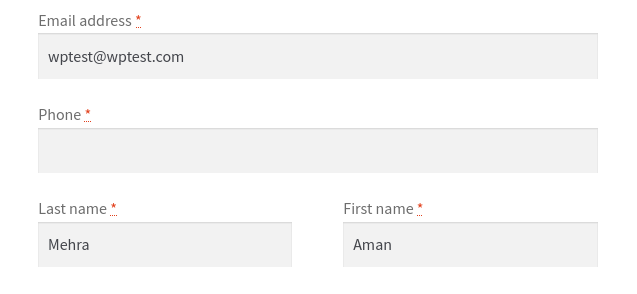
add_filter('woocommerce_checkout_fields', 'custom_checkout_adjust_fields_columns');In the above code, we changed the default CSS classes of the checkout field by accessing the ‘class‘ array of the checkout fields array. See the following output of this.
Move Checkout Fields to Another Group
There are also some situations when you want to move the checkout fields from one group to another group. But it is a little tricky and maybe won’t work for all the situations.
So, you may have to think about why you are moving to another group? Or Is it a good for users experience?
OK. Let’s take an example of moving a checkout field to another group. To move a field, you have to assign that field to another group’s field array and unset the original one.
function custom_checkout_billing_field_another_group($fields) {
// Assign a field to another group array
$fields[ 'order' ][ 'billing_email' ] = $fields[ 'billing' ][ 'billing_email' ];
// Remove the original field
unset( $fields[ 'billing' ][ 'billing_email' ] );
return $fields;
}
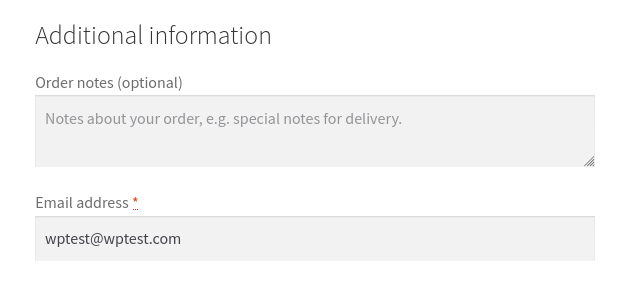
add_filter('woocommerce_checkout_fields', 'custom_checkout_billing_field_another_group');In the above code, we reassign the value of the ‘billing_email‘ field from the original ‘billing‘ group to a new ‘order‘ group. In the next, we also unset the original field from an array. This means that the email field is moved from its original position to a different section in the checkout fields.
Related Links
Conclusion
So, in this tutorial, you learned about all the things to change the order of WooCommerce checkout fields. You learned about how you can set any fields at the top of the checkout form, change the columns CSS classes, and move fields to another group.
By learning how to organize the checkout details in WooCommerce, you can create a smooth and personalized checkout process that fits your business and pleases your customers.
So, tweak your checkout page by customizing it, and see your customers breeze through the last part of their shopping adventure.
FAQs
Changing the order of checkout fields helps you create a smoother and more personalized shopping experience for your customers. It allows you to tailor the checkout process to better suit your business needs.
Not at all! With a few simple lines of code, you can rearrange the checkout fields effortlessly. It’s like customizing the stages of a play to make it more engaging for your audience.
Absolutely! Using conditional logic, you can add a touch of magic to your checkout. Fields can dynamically show or hide based on what your customers choose, adding a personal touch to their journey.
No need to be an expert! While some basic understanding of code helps, there are plenty of resources and examples available. You can follow simple instructions to make the changes you want.
Not at all! You can use CSS to style the checkout fields and ensure they blend seamlessly with your store’s design. It’s like giving your checkout a makeover to match the overall look and feel of your online shop.


